
The 10-second Logo Build Storyboards
In Part 1: Wonder Woods Workshops - Logo Development, we ended with the storyboard of the second half of a 10-second logo build and the 5-second logo build, which did a solid job at representing the brand.
Below, you can see both pages of the rough storyboard, which shows the complete 10-second open.
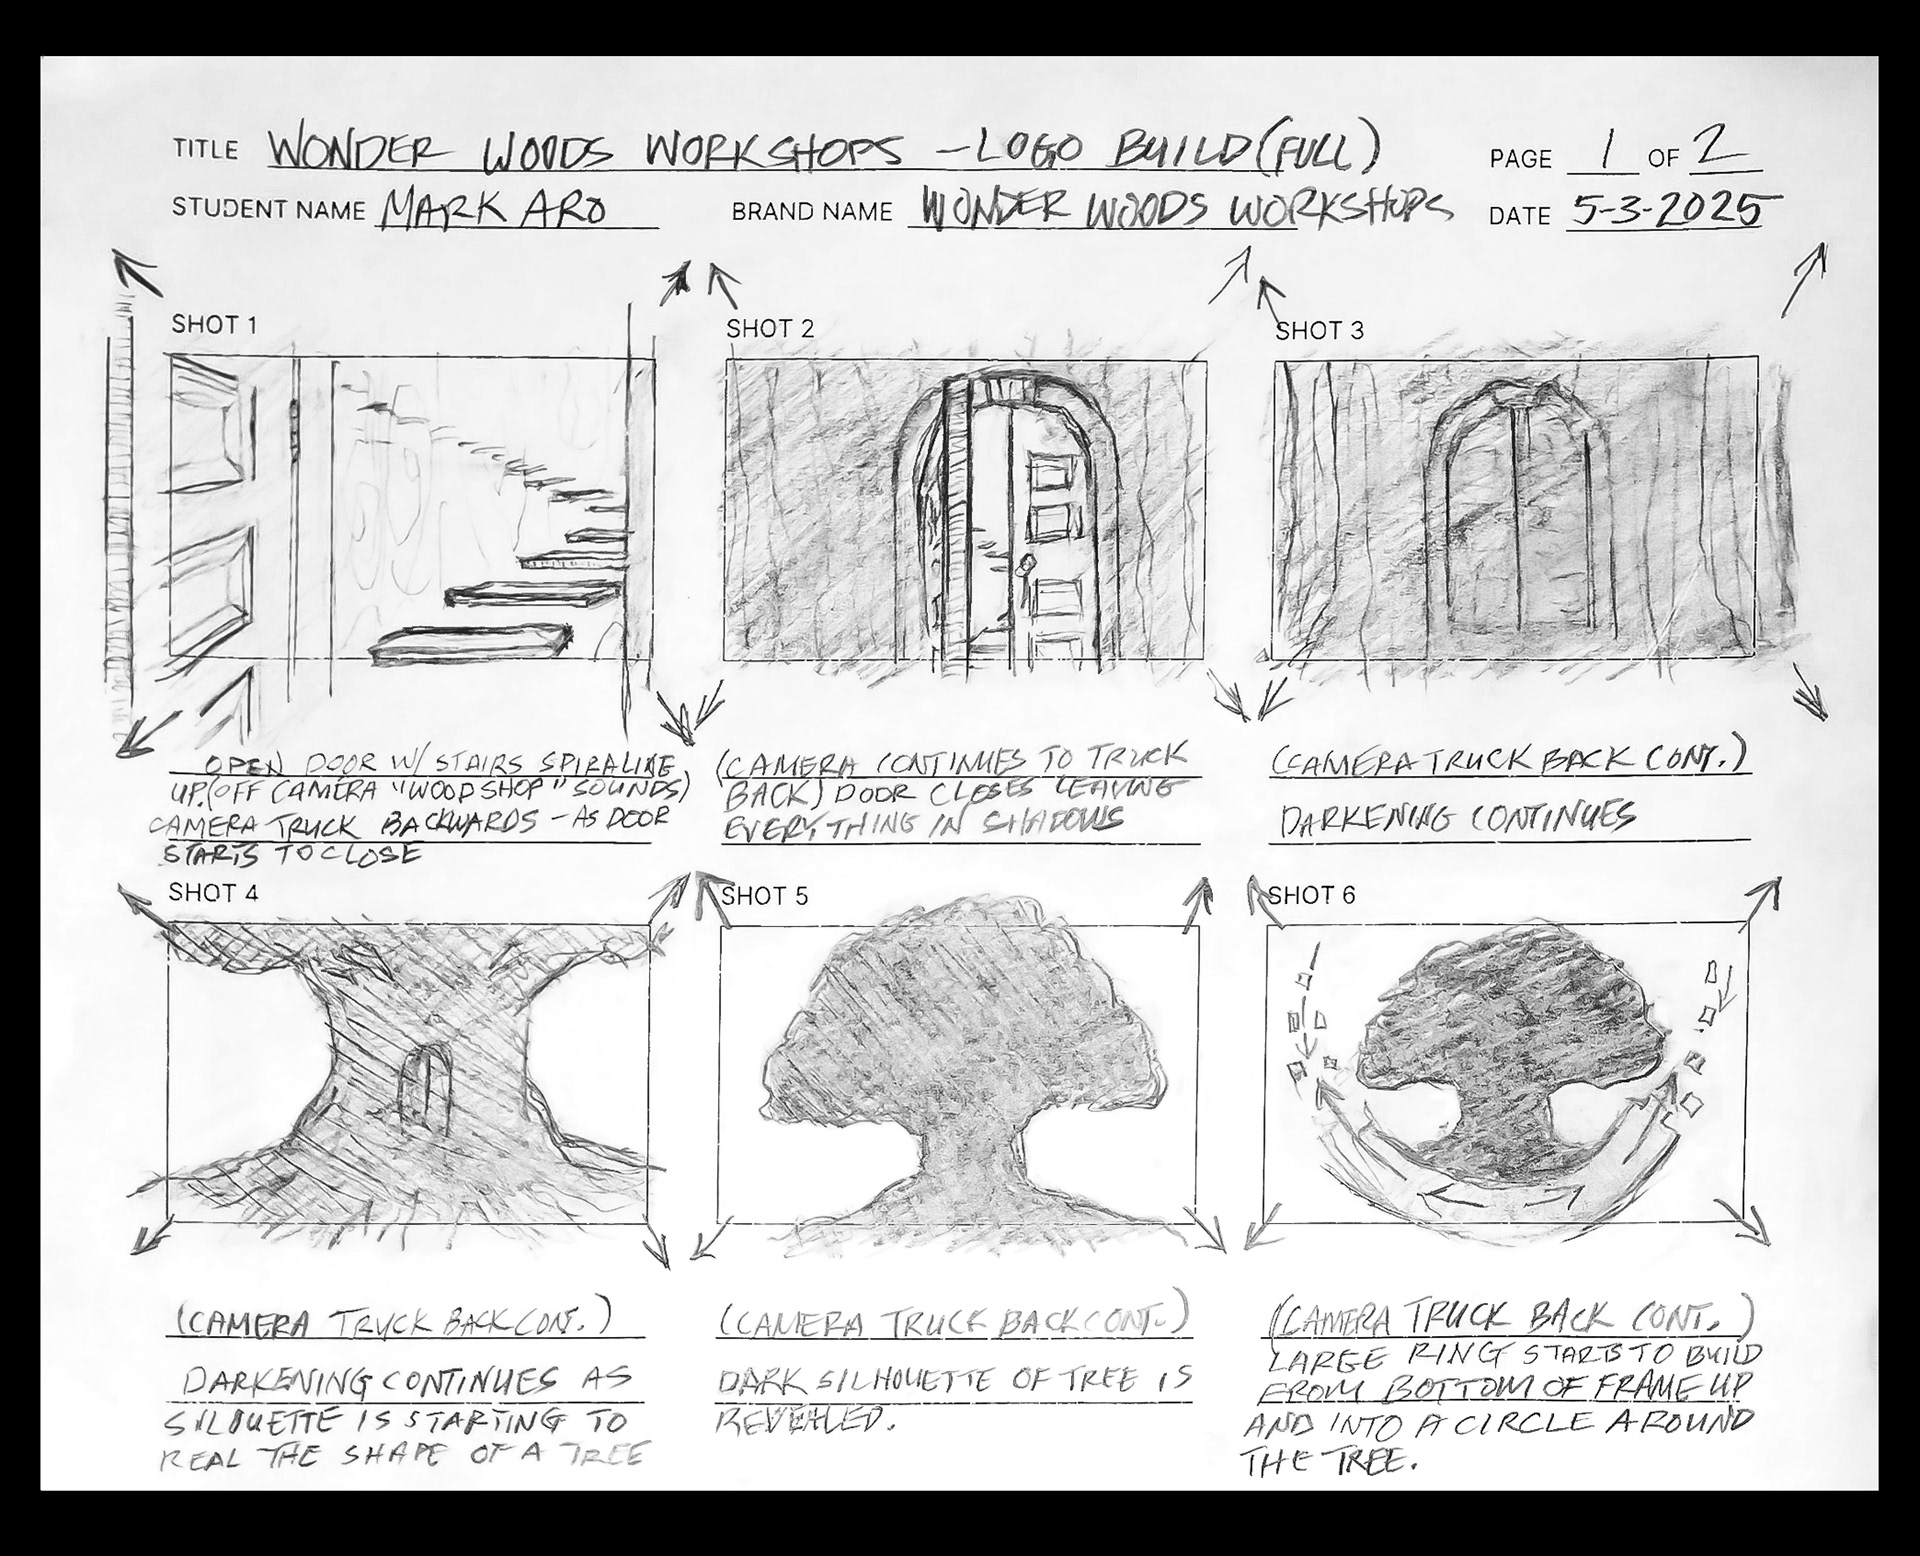
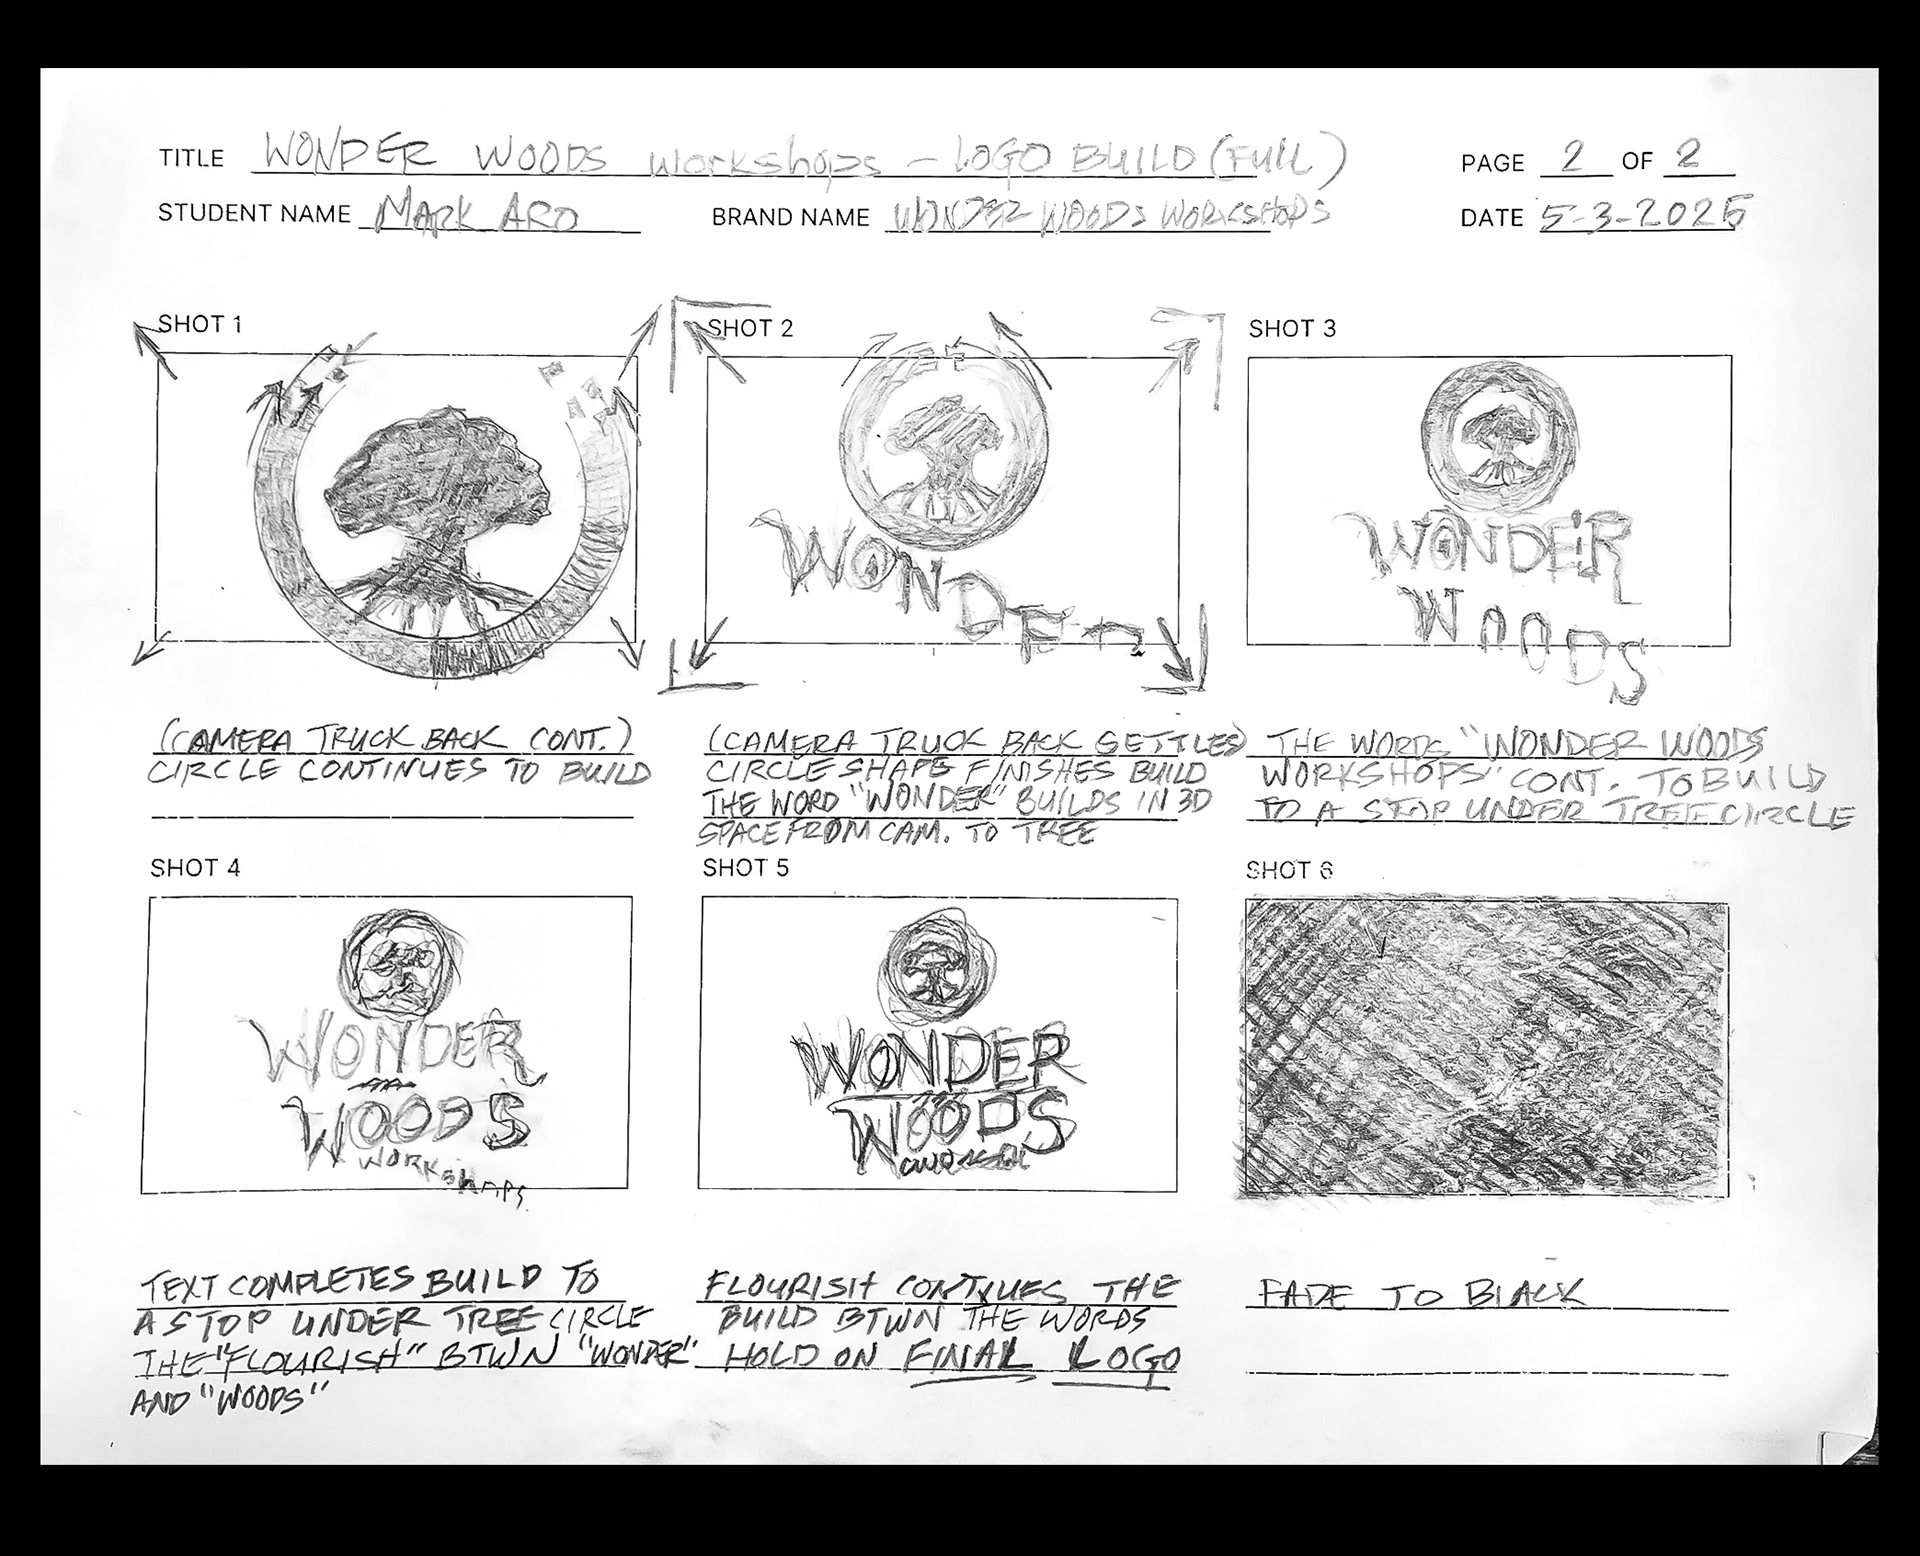
Hopefully, the storyboards make sense. The idea behind it is that the customer is only privy to a glimpse of the magic inside one of many of these magical workshops within the brand. The viewer is then sped away as we see the brand identity build in front of their eyes, all in 3D space. Here's the complete 10-second logo build for Wonder Woods Workshops. Then, we will break down some of the processes that were involved in creating this piece of the brand identity.

Wonder Woods Workshops
10-second Logo Build Animation

A glimpse inside the tree and its construction
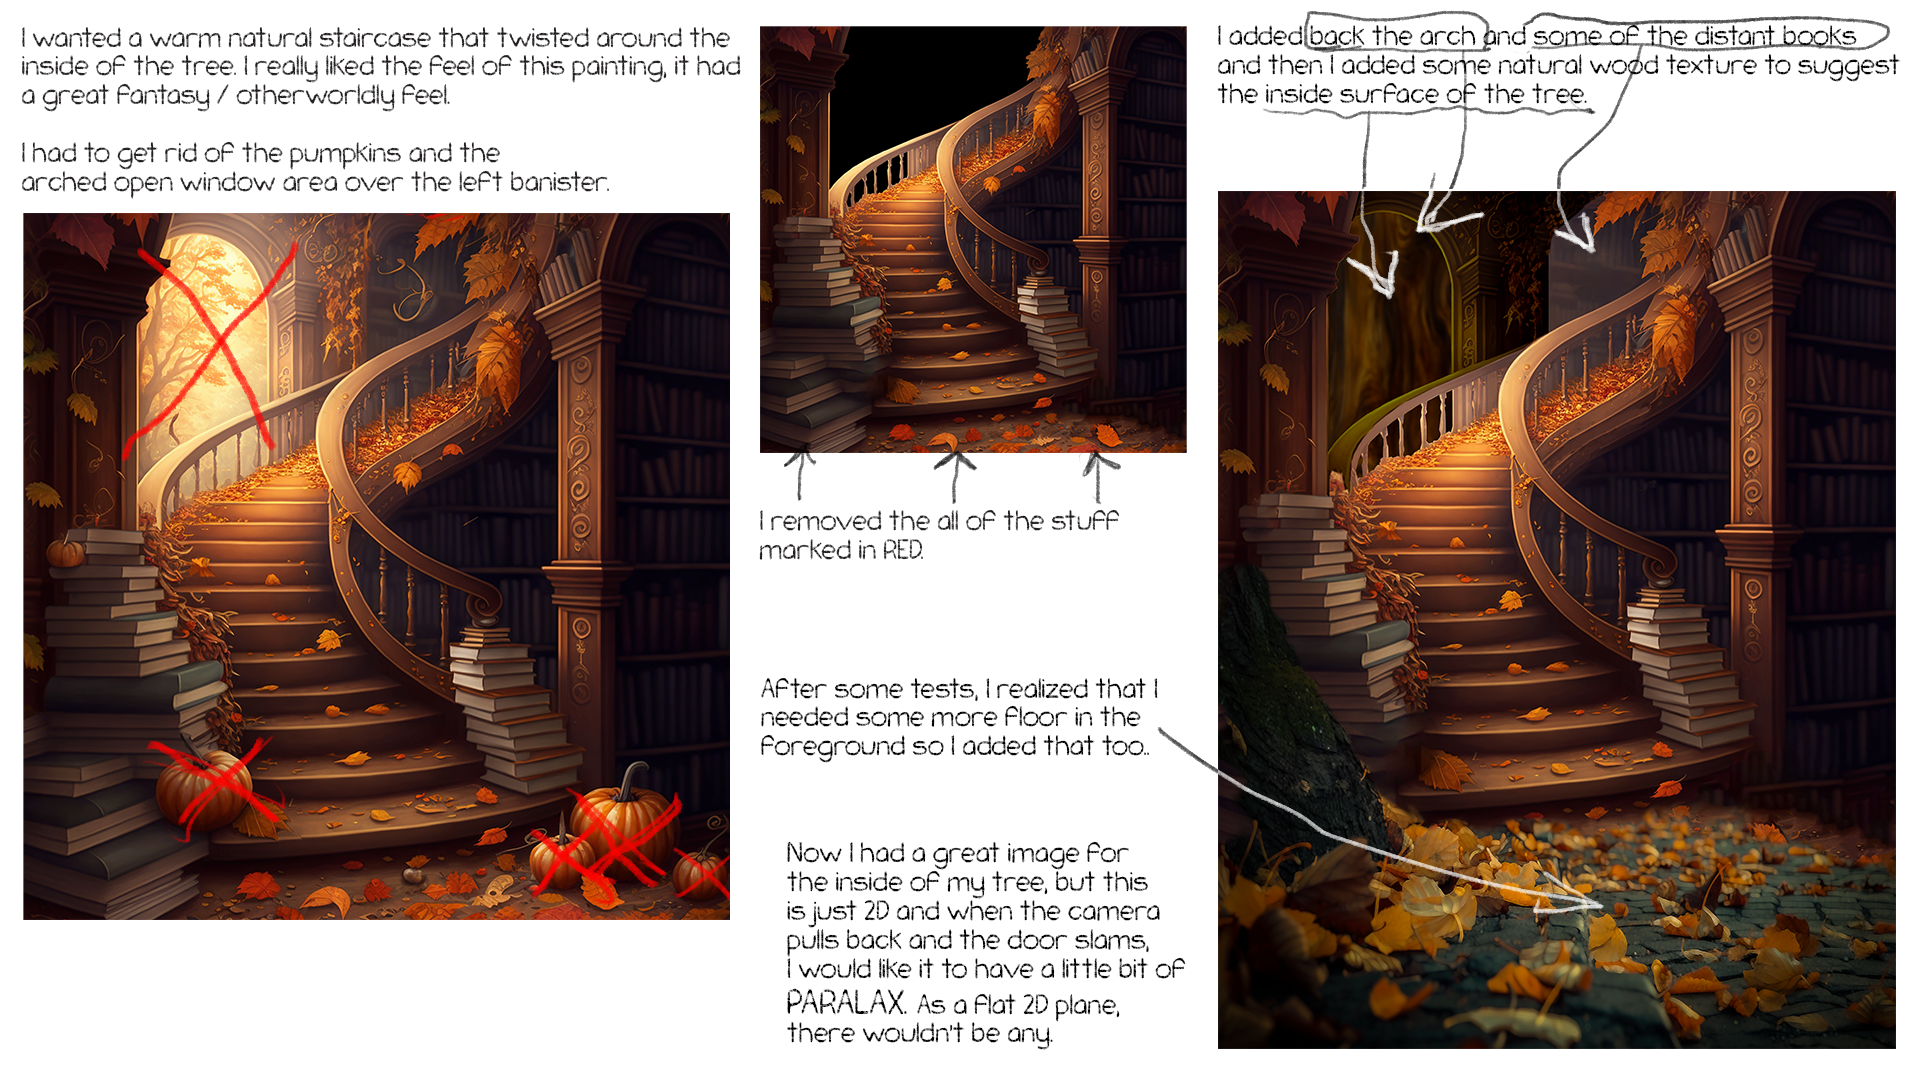
The next step is to take my image and fake a 3D scene using a tool that generates a depth map and extrudes the image, converting it into a crude 3D model. It is far from perfect, and it will allow you a little vertical or horizontal movement before the image starts to break down. This is a tool called ZoeDepth. Click on the name to follow the link,
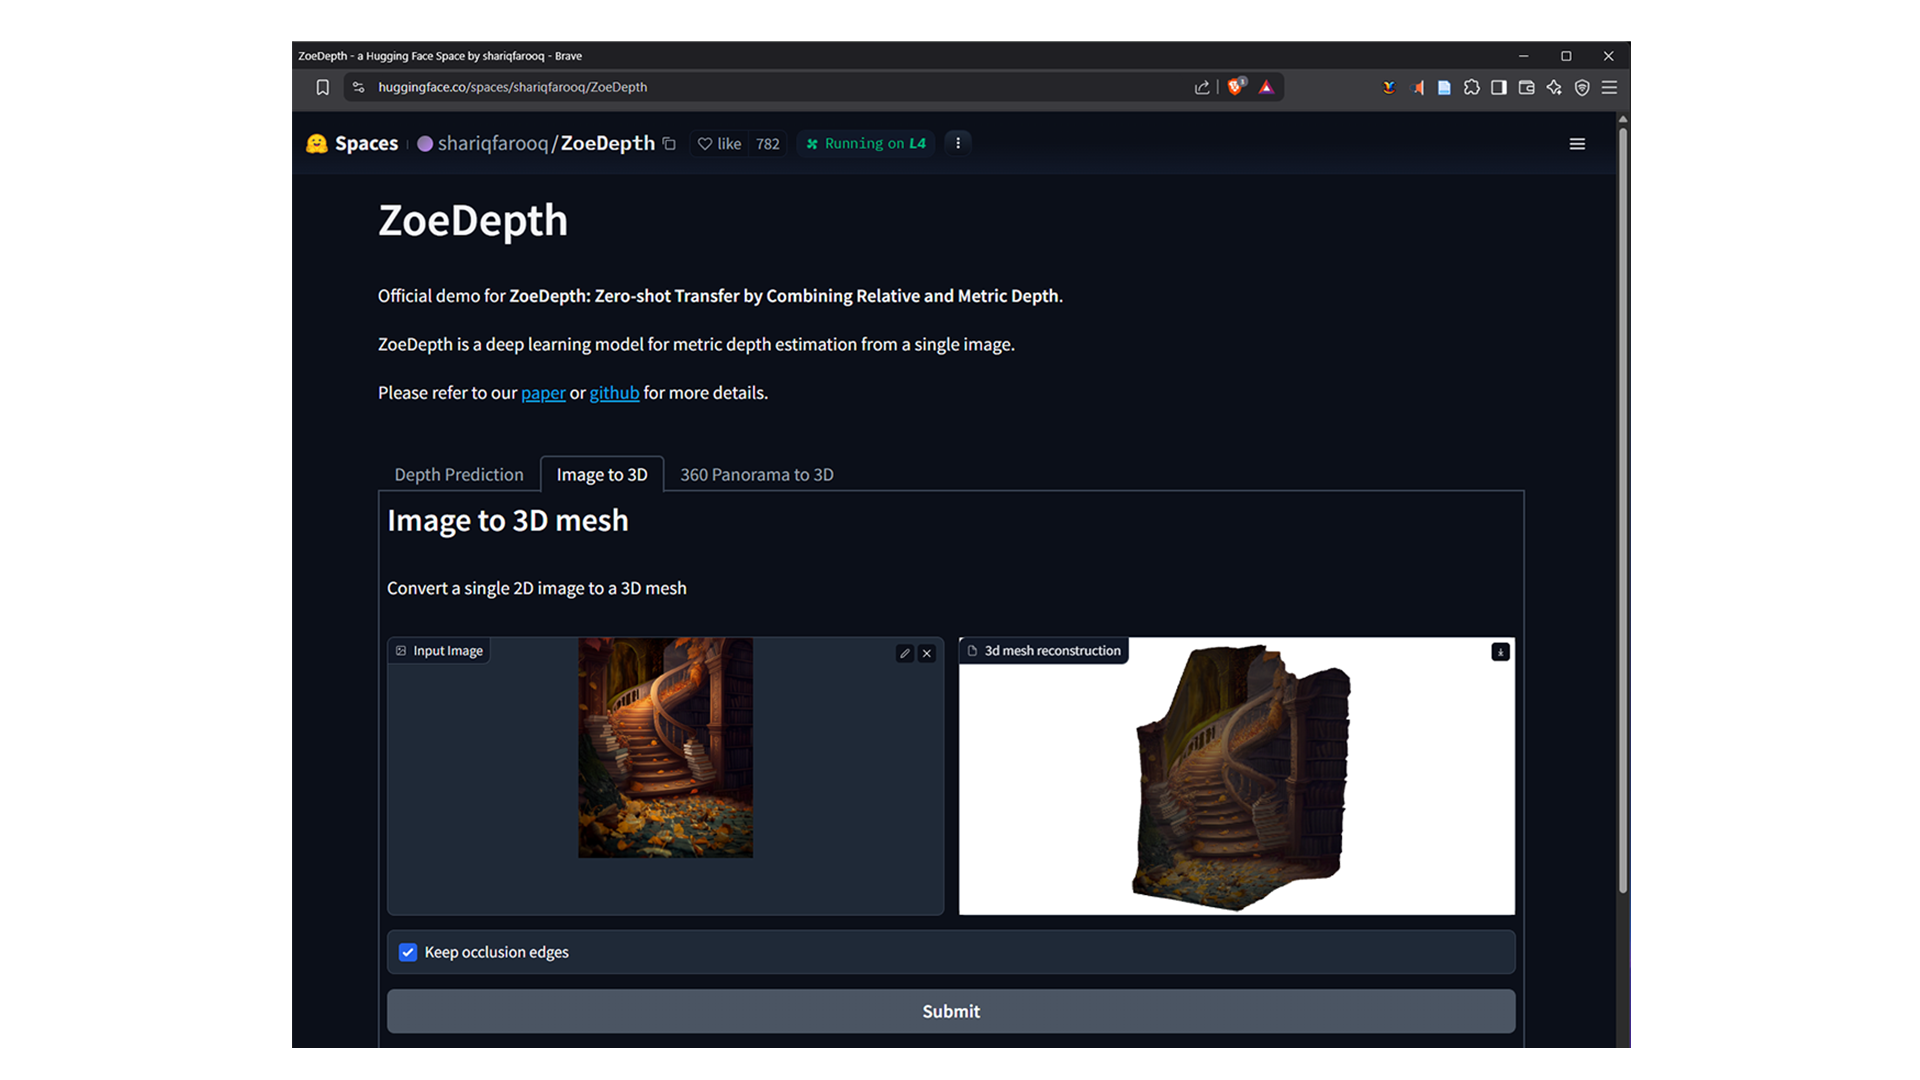
All you do is load your image into the INPUT IMAGE AREA and then hit submit to generate a 3D model based on a 2D image. Check out the 3D viewer below and rotate around the model that I generated based on a 2D image.
To look at the model that was generated, just hit PLAY (below) and use your cursor to look at the 3D mesh that was generated.
It is not perfect, but it does a good job at faking it. Once you find the sweet spot, you can see that there is a little wiggle room before the image starts to look wonky. I don't see this as full-on 3D, but it's better than a flat plane with an image on it.
The next step shows the only 3D model in the whole animation...
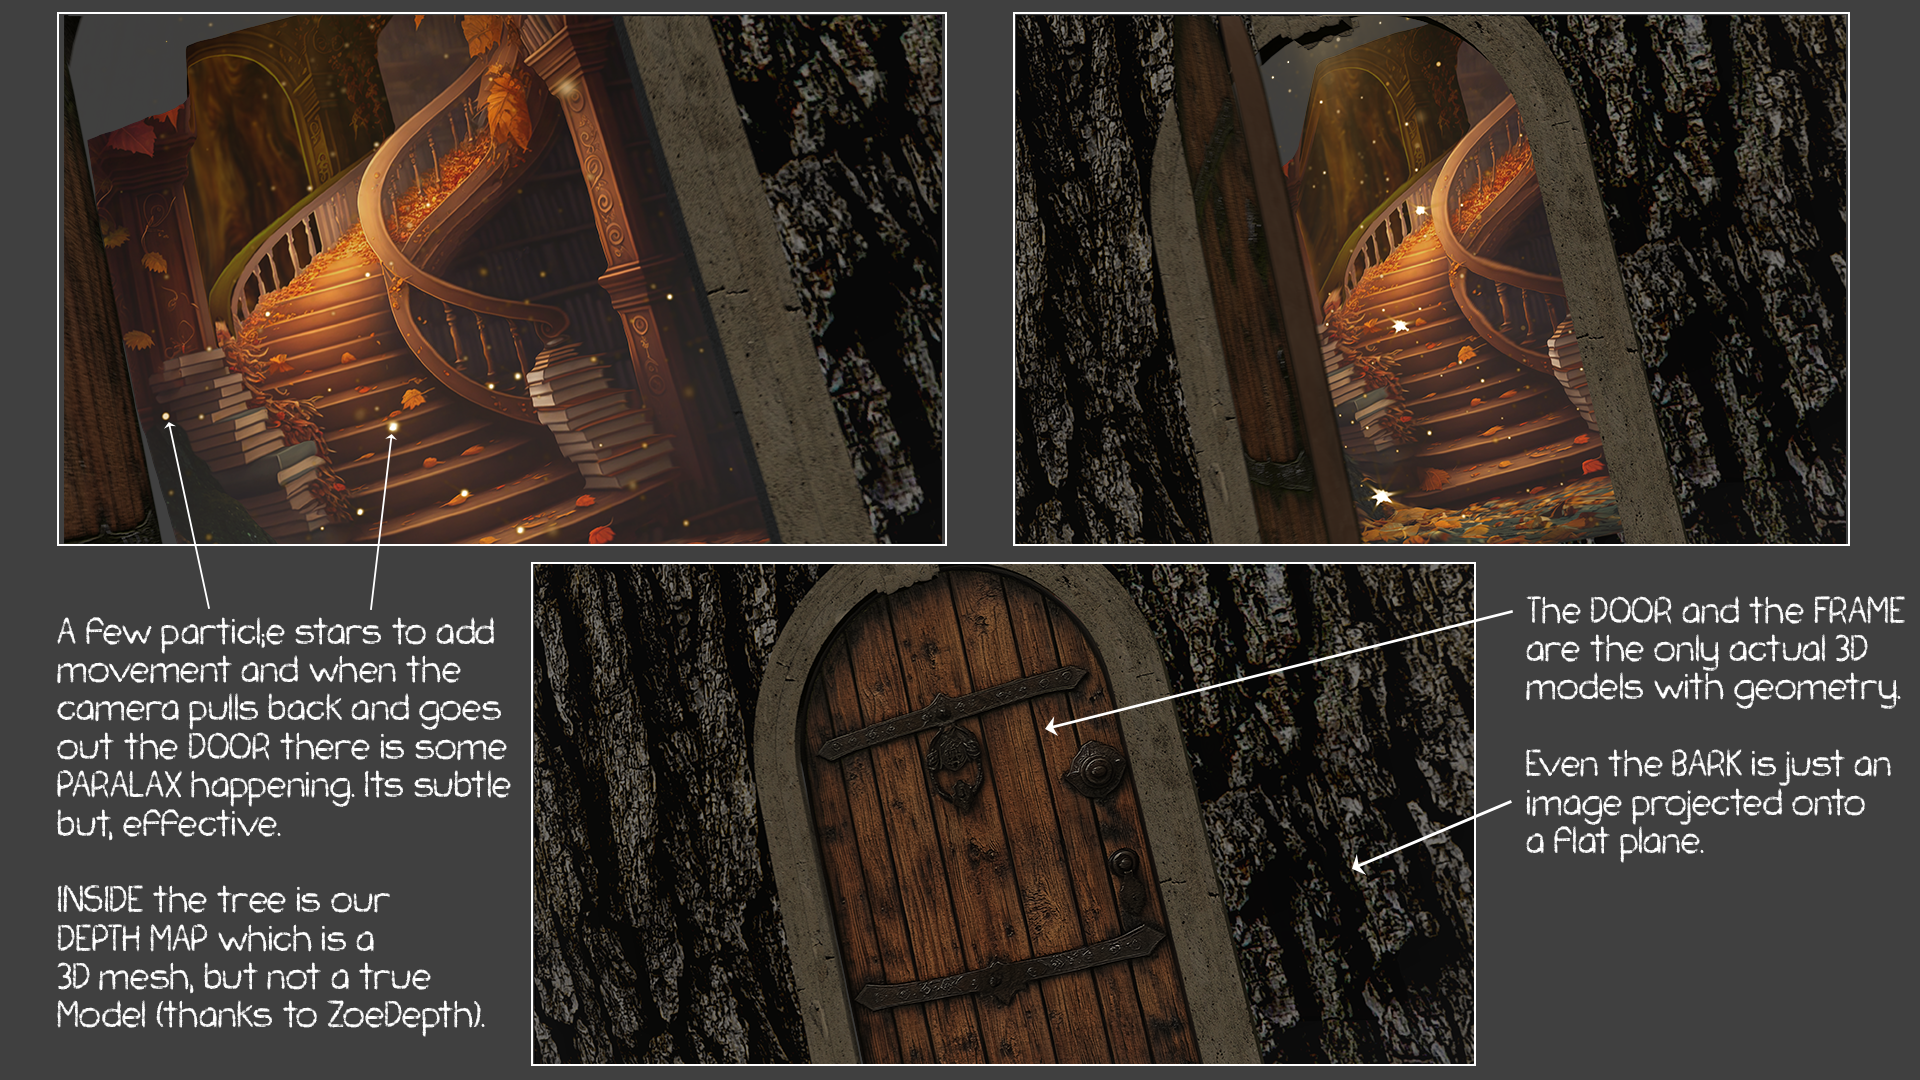
The 3D is handled inside of After Effects with a plugin from VideoCoPilot.net called
Element 3D v2.2
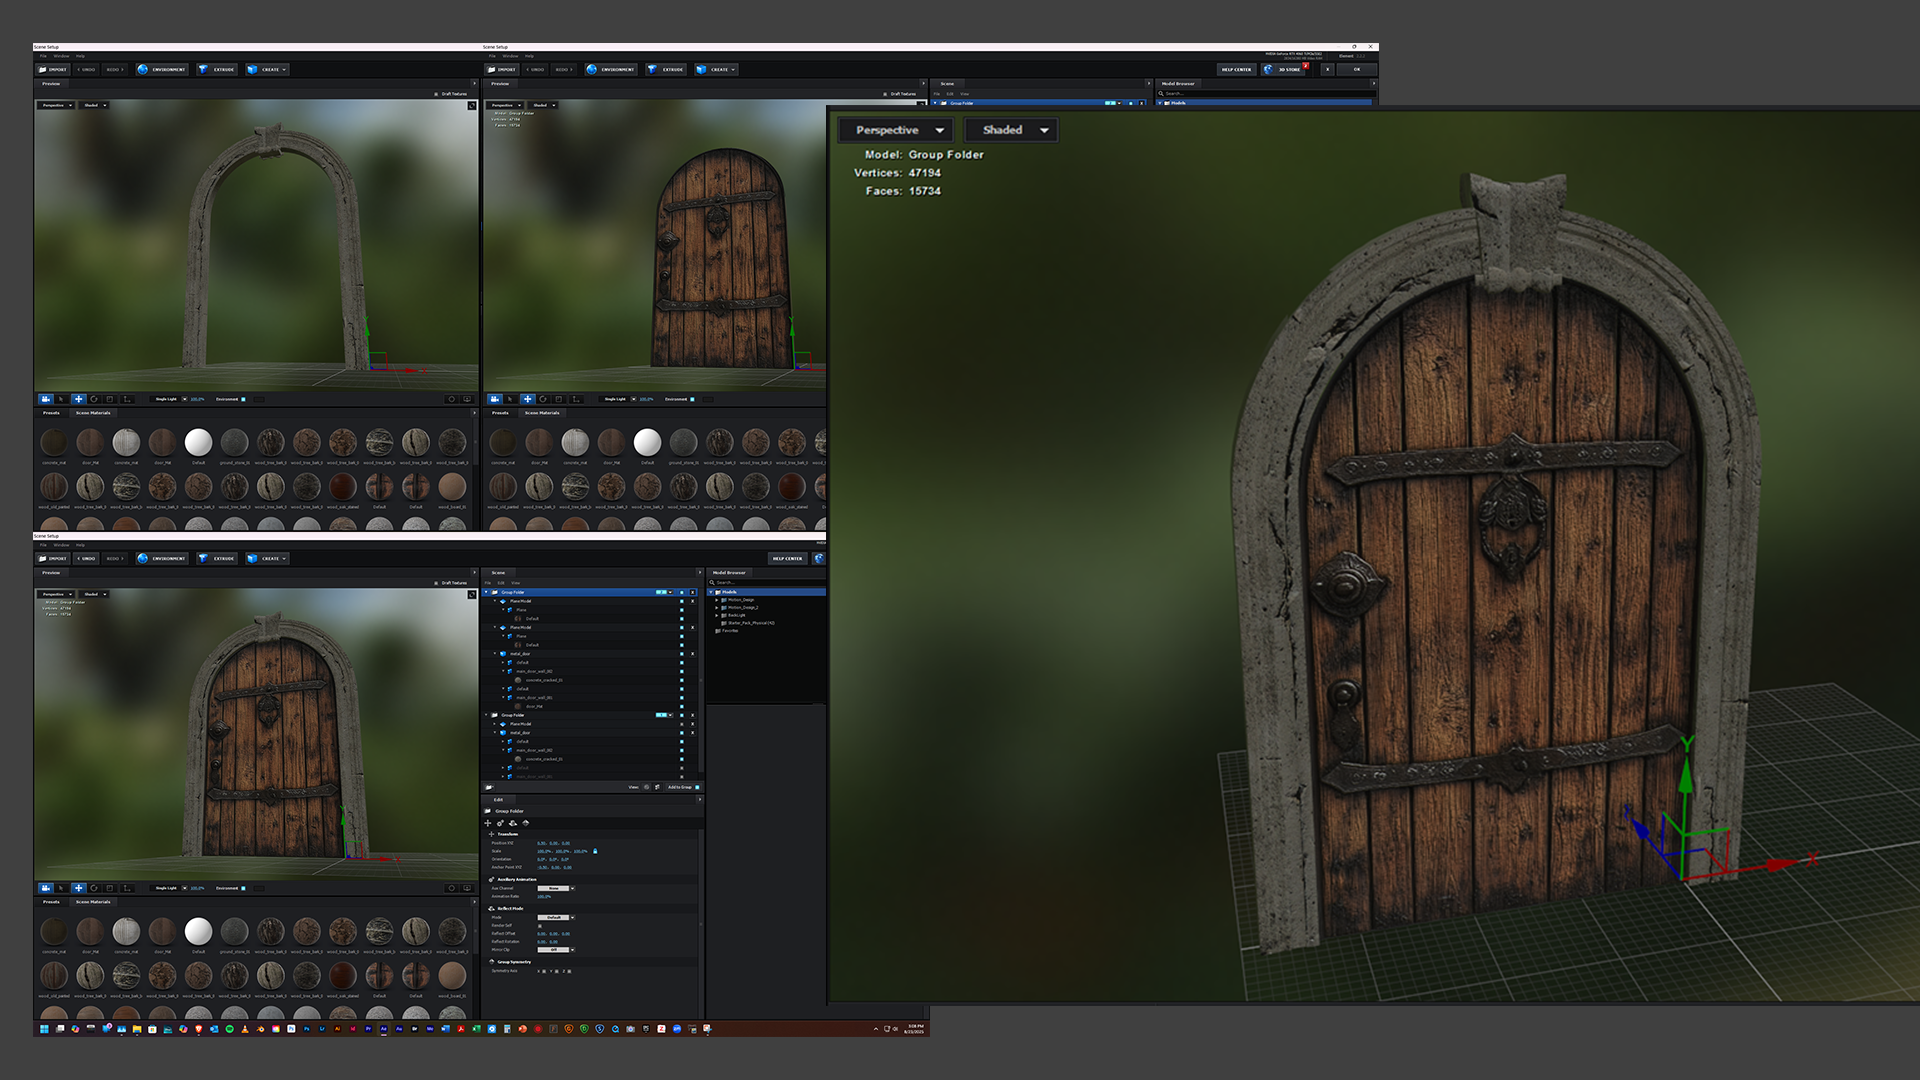
The rest of the animation is all smoke and mirrors. It all starts with a highly detailed and layered Photoshop file. Here's a screen grab from the Photoshop file.
The file is quite large at 7680 x 4320 You must make the file large enough so that when you zoom into a specific area and pass close by a particular layer, you don't see the pixelization.
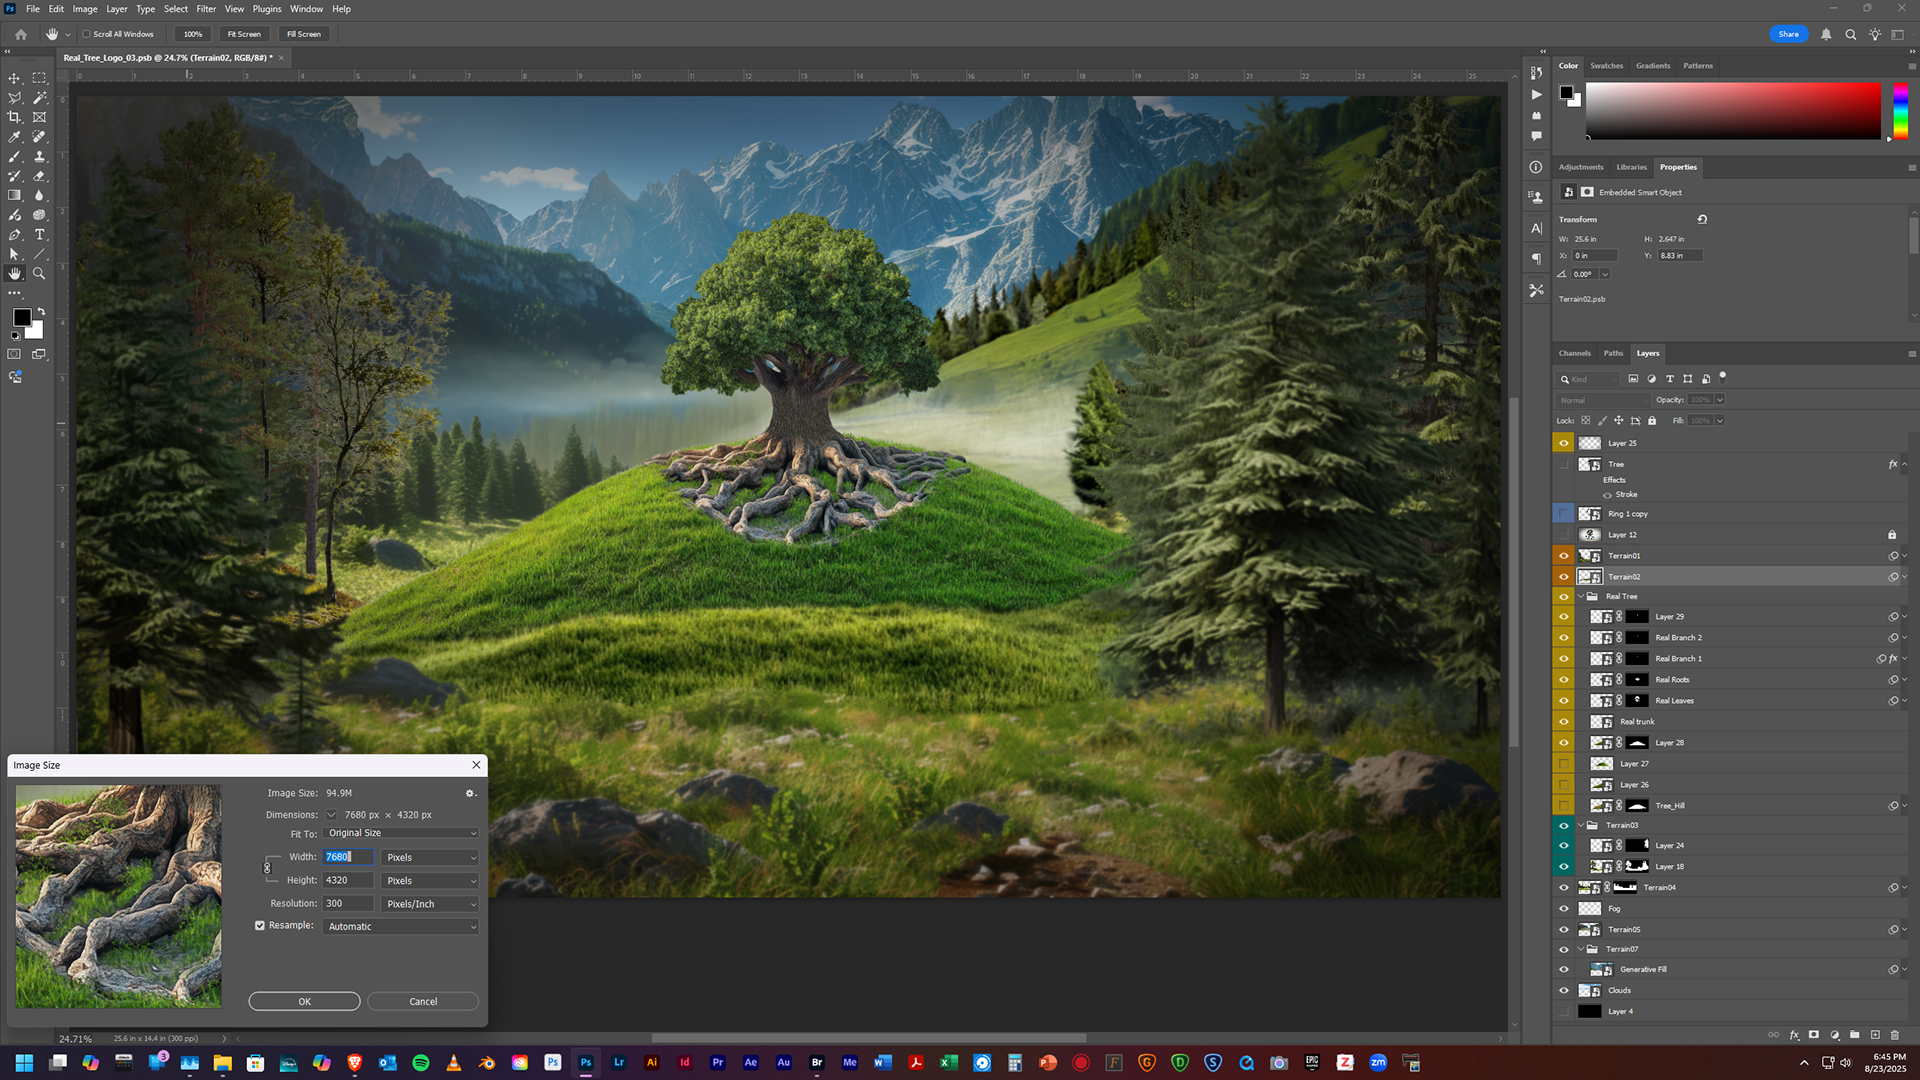
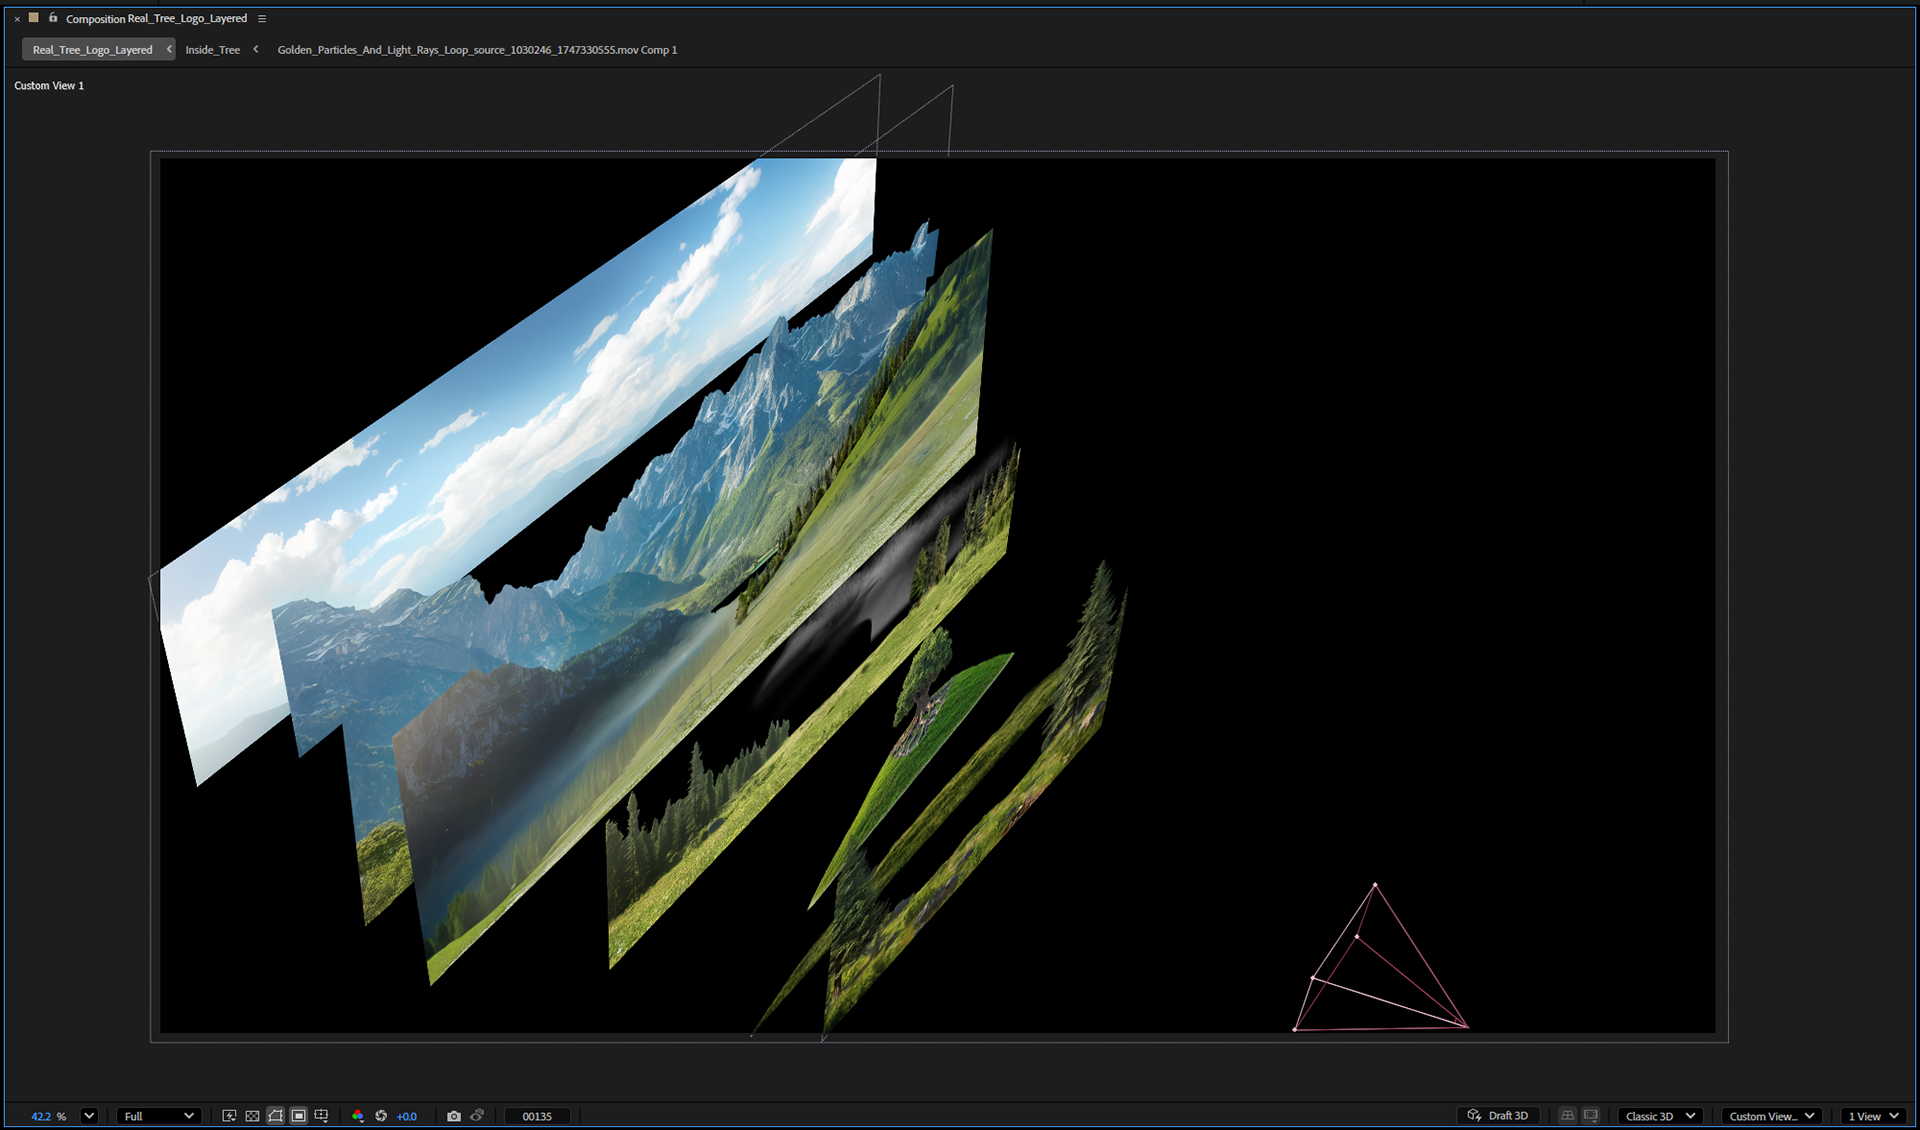
These layers are imported into After Effects, and then in a 3D-enabled workspace, they are spread apart from each other in the Z-direction and scaled, so when the camera pulls back from the tree, we have space between each section, which creates wonderful parallaxing.
Here's a wireframe view of each layer that is in the scene.
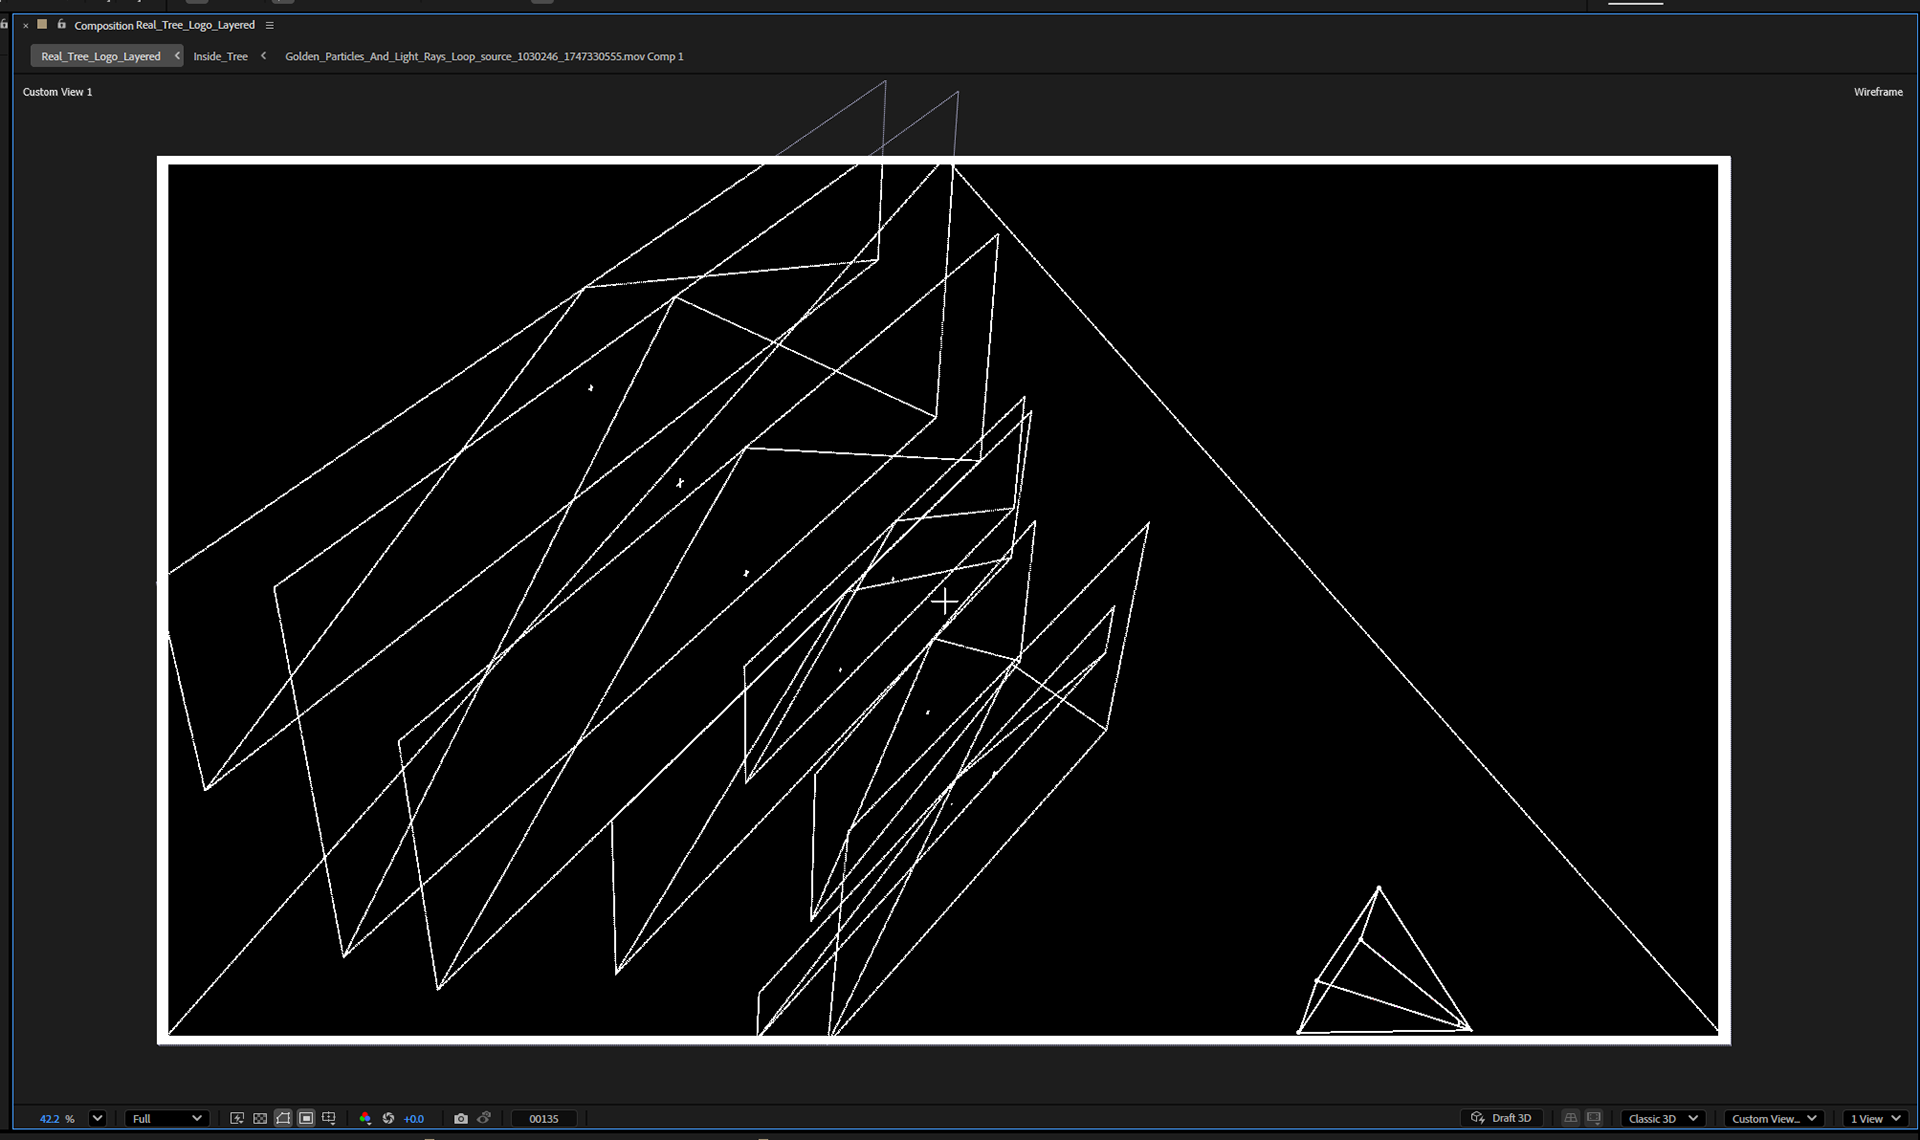
Below is an elevated shot showing the separated layers to show depth and parallax.